こんにちは、遠藤です。
決済APIに関する知見を広げるためにカード決済のテスト実装を実施してみました。
StripeとSquareが代表的なのかな。くらいの知識しかなく、決済導入したいとご依頼があった場合にもスムーズに対応できるように普段利用しているLaravelとSquareでカード決済を実装しました。
できる限り最小限のコードのみでカード決済を実装しており、決済API初心者の方でもスムーズに理解しやすい内容となっていると思います。
目次
- Squareでアプリケーション作成
- パッケージインストール
- 環境変数設定
- フロントエンド構築
- バックエンド構築
- テスト決済実施
1. Squareでアプリケーション作成
1-1. アカウントの作成
最初に Square Developper (https://developer.squareup.com/)のアカウントを作成し、ログインします。
1-2. アプリの作成
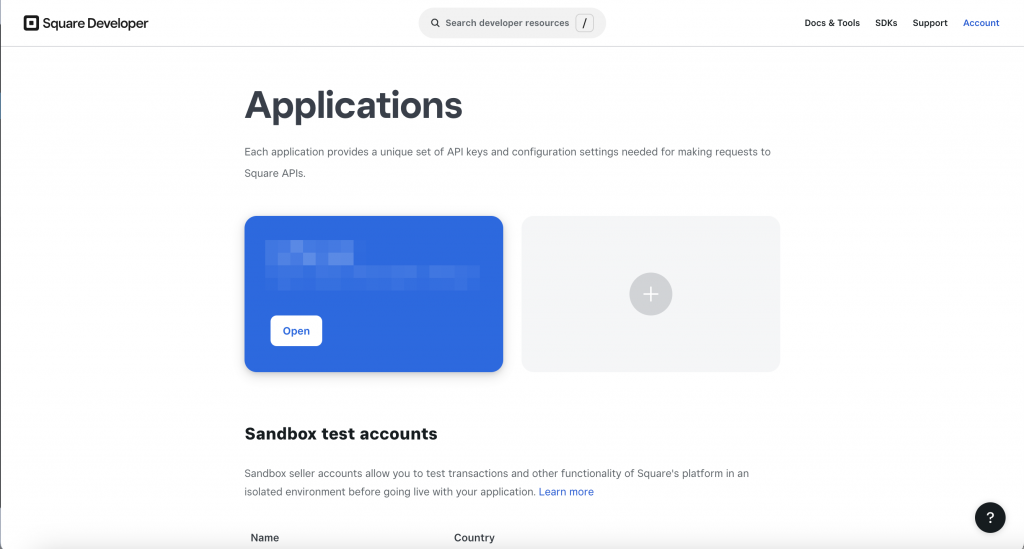
アカウント作成時にシステムから聞かれる質問に答えていけば、アプリが既に作られた状態になっているかなと思いますが、作成方法を以下に記載します。
「+」ボタンを押下します。
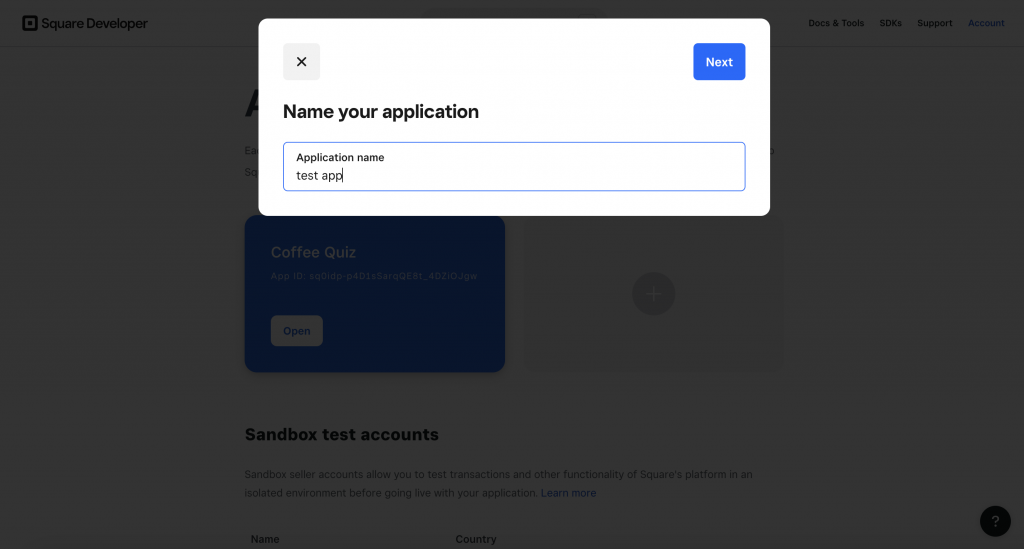
アプリ名を入力します。
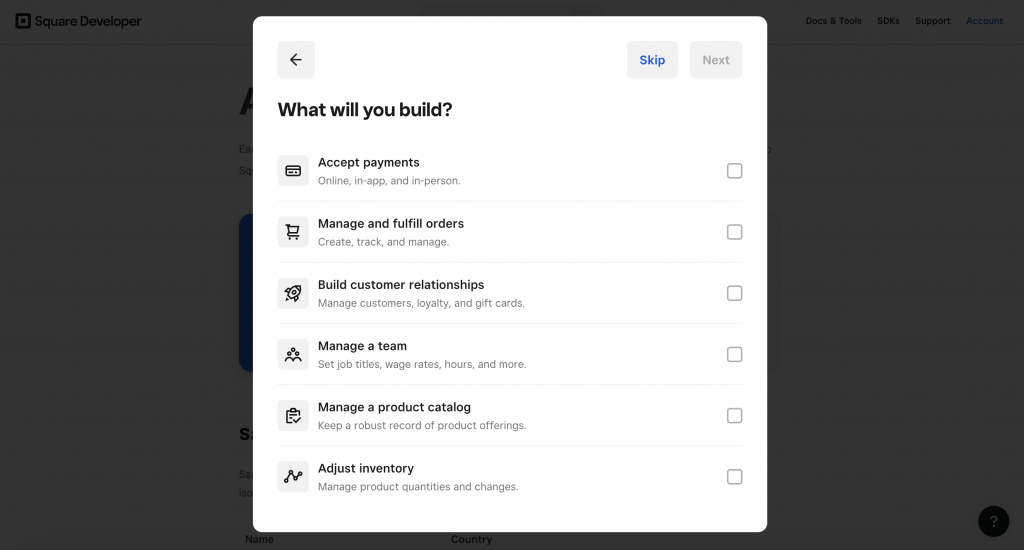
いろいろと聞かれますが、全てスキップで問題ないです。
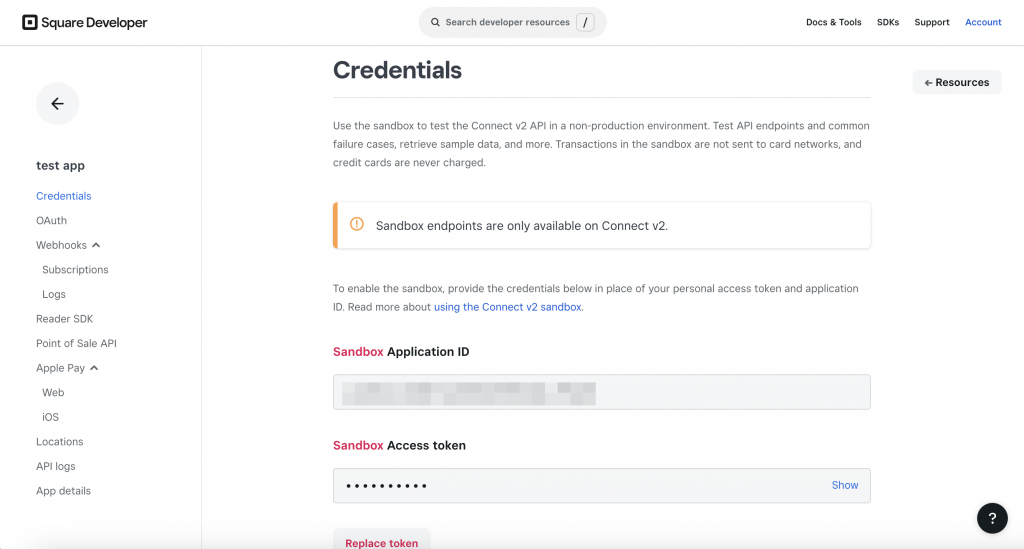
Skipしていくとアプリの作成が完了し、Credential情報のページに遷移します。
以上でアプリの作成は完了です。
2. パッケージインストール
LaravelにはSquare用のSDKが用意されているため、以下を実行してインストールします。
|
1 |
composer require square/square |
SDKのGithubURL:https://github.com/square/square-php-sdk
3. 環境変数設定
3-1. Squareにて環境変数を確認
Application ID と Access token をメモしておきます。
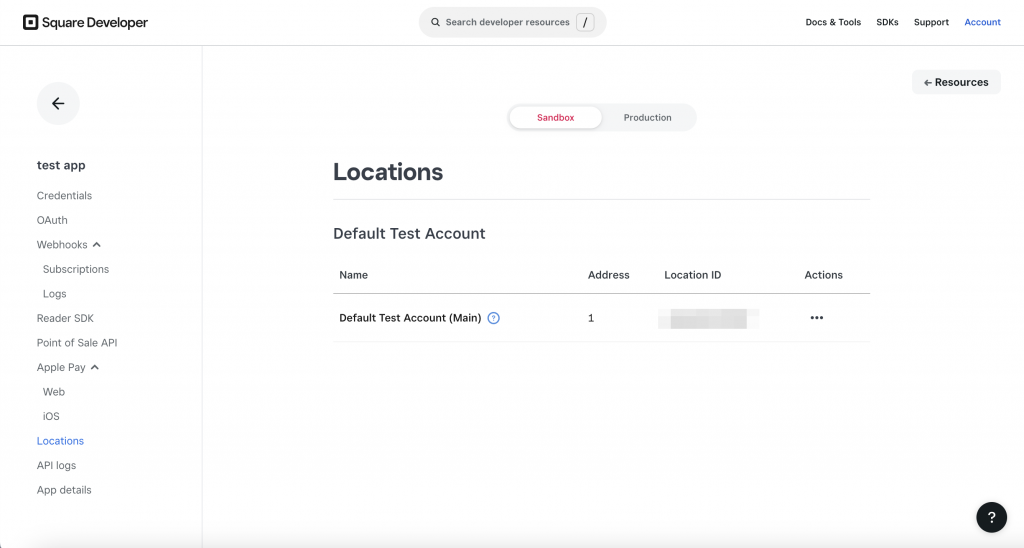
次に左メニューの「Location」を押下します。Location ID をメモしておきます。
3-2. envに設定
上記でメモした内容をenvファイルにに反映します。
|
1 2 3 4 |
SQUARE_ENVIRONMENT=sandbox // テスト環境での実施のためsandboxを設定 SQUARE_APPLICATION_ID=[アプリケーションID] SQUARE_ACCESS_TOKEN=[アクセストークン] SQUARE_LOCATION_ID=[ローケーションID] |
3-3. configに設定
Laravelにデフォルトで用意されている各種サービス用の設定ファイル(/config/service.php)に以下を追記します。
|
1 2 3 4 5 6 7 8 9 10 11 12 13 14 15 16 17 18 19 20 21 22 23 24 |
<?php return [ /* |-------------------------------------------------------------------------- | Third Party Services |-------------------------------------------------------------------------- | | This file is for storing the credentials for third party services such | as Mailgun, Postmark, AWS and more. This file provides the de facto | location for this type of information, allowing packages to have | a conventional file to locate the various service credentials. | */ 'square' => [ 'env' => env('SQUARE_ENVIRONMENT'), 'application_id' => env('SQUARE_APPLICATION_ID'), 'token' => env('SQUARE_ACCESS_TOKEN'), 'location_id' => env('SQUARE_LOCATION_ID'), ], ]; |
4. フロントエンド構築
routes/web.phpに以下を設定します。
|
1 2 3 |
Route::get('/square', function () { return view('square'); }); |
resources/views/square.blade.phpに以下を記述します。
カード情報入力用のボックスを用意し、支払いボタン押下時にバックエンドで作成する決済APIを実行しています。
|
1 2 3 4 5 6 7 8 9 10 11 12 13 14 15 16 17 18 19 20 21 22 23 24 25 26 27 28 29 30 31 32 33 34 35 36 37 38 39 40 41 42 43 44 45 46 47 48 49 50 51 52 53 54 55 56 57 58 59 60 61 62 63 64 65 66 67 68 69 70 |
<!DOCTYPE html> <html lang="{{ str_replace('_', '-', app()->getLocale()) }}"> <head> <meta charset="utf-8"> <meta name="viewport" content="width=device-width, initial-scale=1"> <title>LaravelとSquareで決済実装(最小限のコード)</title> <meta name="csrf-token" content="{{ csrf_token() }}"> <script src="https://code.jquery.com/jquery-3.3.1.js"></script> <script type="text/javascript" src="https://sandbox.web.squarecdn.com/v1/square.js" ></script> <script> const applicationId = "{{ config('services.square.application_id') }}"; const locationId = "{{ config('services.square.location_id') }}"; async function cardInit(payments) { try { const card = await payments.card(); await card.attach('#cardBox'); return card; } catch (e) { alert(e); } } async function getToken(paymentMethod) { const result = await paymentMethod.tokenize(); if (result.status === 'OK') { return result.token; } else { alert(result.errors); } } async function createPayment(token) { $.ajax({ type: 'POST', headers: { 'Content-Type': 'application/json', 'X-CSRF-TOKEN': $('meta[name="csrf-token"]').attr('content') }, url: '/api/v1/square/payment', data: JSON.stringify({ locationId, sourceId: token, }), dataType : "json" }).done(function(result){ alert( '決済ID:' + result.payment.id + ' 支払い額:' + result.payment.amount_money.amount + '円' ); }) } $(window).on('load', async function () { const payments = window.Square.payments(applicationId, locationId); const card = await cardInit(payments); $('#button').on('click', async function (event) { const token = await getToken(card); await createPayment(token); }); }); </script> </head> <body> <form> <h1>入会費:2500円</h1> <div id="cardBox"></div> <button id="button" type="button">支払う</button> </form> </body> </html> |
ここまで実装した時点で/squareにアクセスすると以下の画面が表示されるはずです。
5. バックエンド構築
/routes/api.phpに以下を設定します。
|
1 2 3 |
use App\Http\Controllers\Square\SquareController; Route::post('/v1/square/payment', [SquareController::class, 'createPayment'])->name('square.createPayment'); |
/app/Http/Controllers/Square/SquareController.phpに以下を記述します。
金額等を設定してSDKの利用により、決済APIを実行しています。
|
1 2 3 4 5 6 7 8 9 10 11 12 13 14 15 16 17 18 19 20 21 22 23 24 25 26 27 28 29 30 31 32 33 34 35 36 37 38 39 40 41 42 43 44 45 46 47 48 49 50 |
<?php namespace App\Http\Controllers\Square; use Illuminate\Http\Request; use App\Http\Controllers\Controller; use Illuminate\Support\Str; use Square\SquareClient; class SquareController extends Controller { public function __construct() { $this->client = new SquareClient([ 'accessToken' => config('services.square.token'), 'environment' => config('services.square.env'), ]); } public function createPayment(Request $req) { try { $data = $req->all(); $amountMoney = new \Square\Models\Money(); $amountMoney->setAmount(2500); $amountMoney->setCurrency('JPY'); $body = new \Square\Models\CreatePaymentRequest( $data['sourceId'], Str::uuid()->toString(), ); $body->setAmountMoney($amountMoney); $res = $this->client->getPaymentsApi()->createPayment($body); if ($res->isSuccess()) { return response()->json($res->getResult()); } else { throw new \Exception(); } } catch (\Exception $e) { throw new \Exception($e->getMessage()); } } } |
6. テスト決済実施
/squareにアクセスします。
カード番号等を入力して支払うボタンを押下します。
支払いが完了するとアラートで決済IDと支払額が表示されます。これで決済完了です。
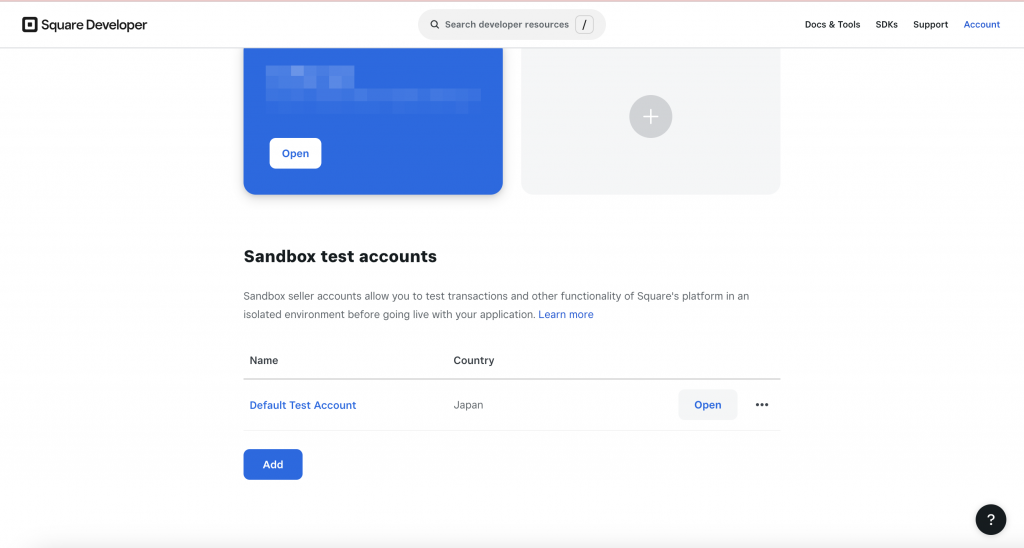
Squareの管理画面にて決済が反映されているか確認します。「Sandbox test accounts」の「Open」を押下します。
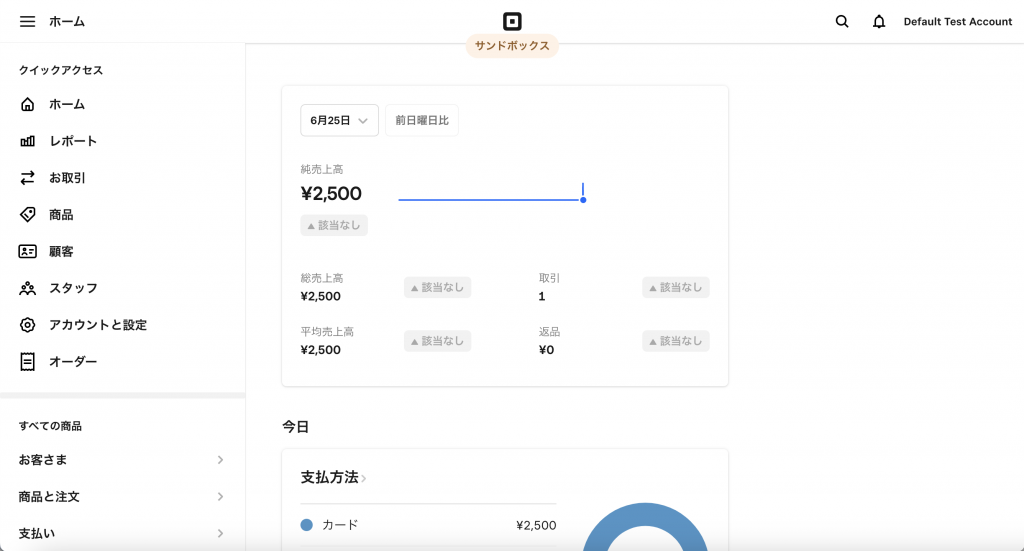
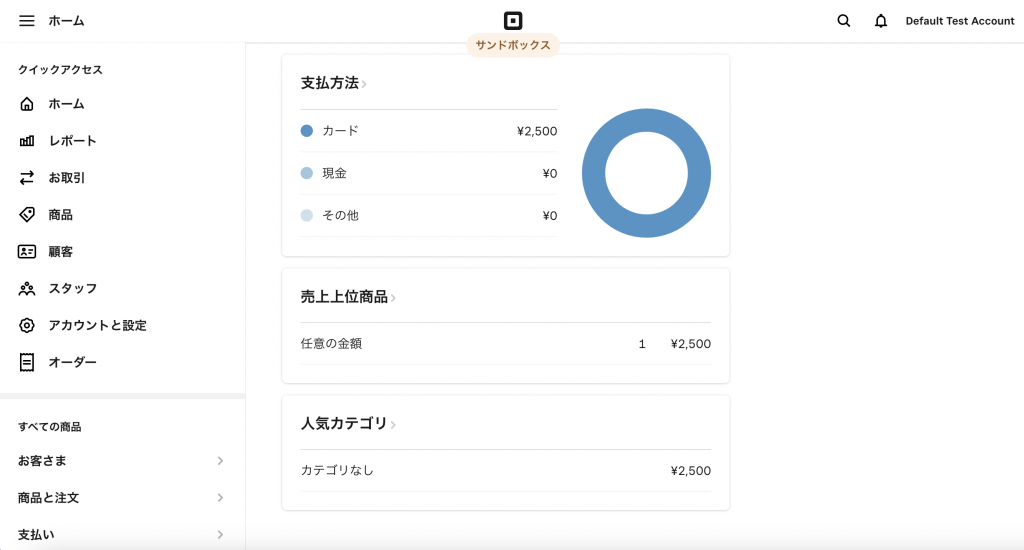
先ほど実施した決済が反映されています。
どんな方法で支払ったかなどの内訳も見れるそうです。

